
How to Use Talgora
Set up your aesthetic clinic step by step and get Talgora ready for your day-to-day workflow.
A clear setup process without unnecessary complexity.
Your setup path
Create your Talgora clinic account.
Confirm the email used for registration.
Review your clinic defaults.
Open your clinic workspace.
Add practitioners to the clinic.
Configure each doctor's working hours.
Add the treatments your clinic offers.
Configure plans associated with services.
Prepare items and consumables.
Create your first client profile.
Build your clinic workspace in the right order.
Step 01
Create Your Clinic
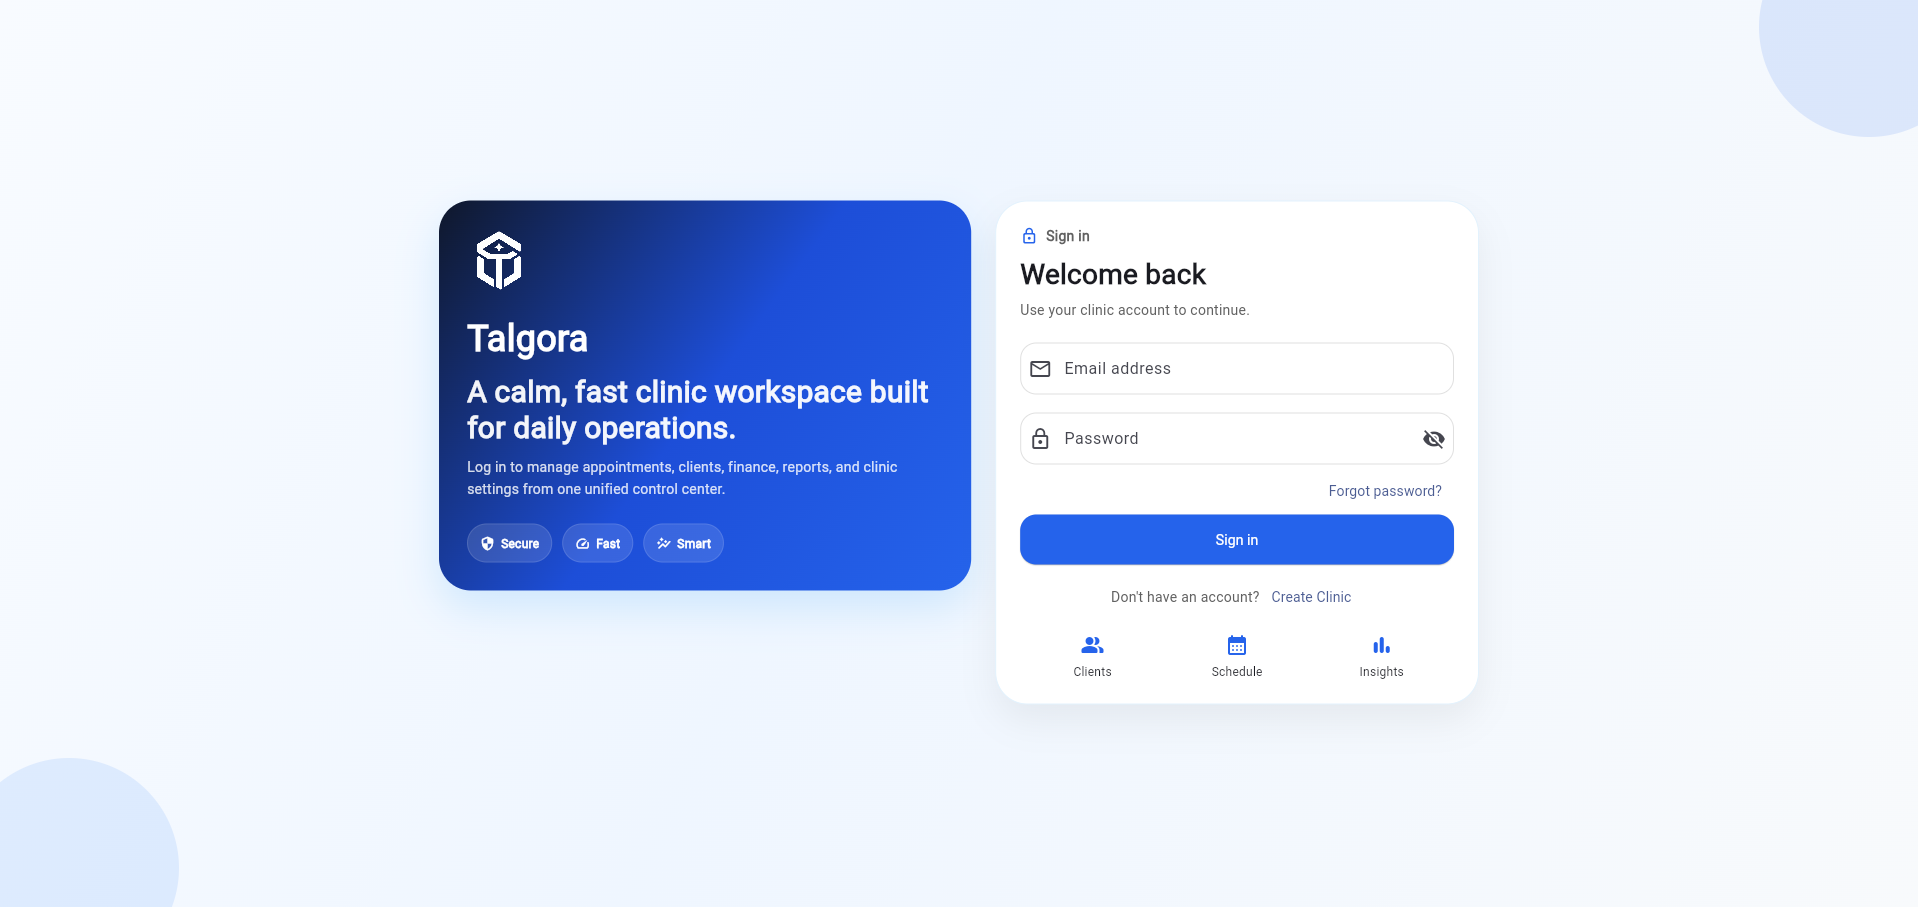
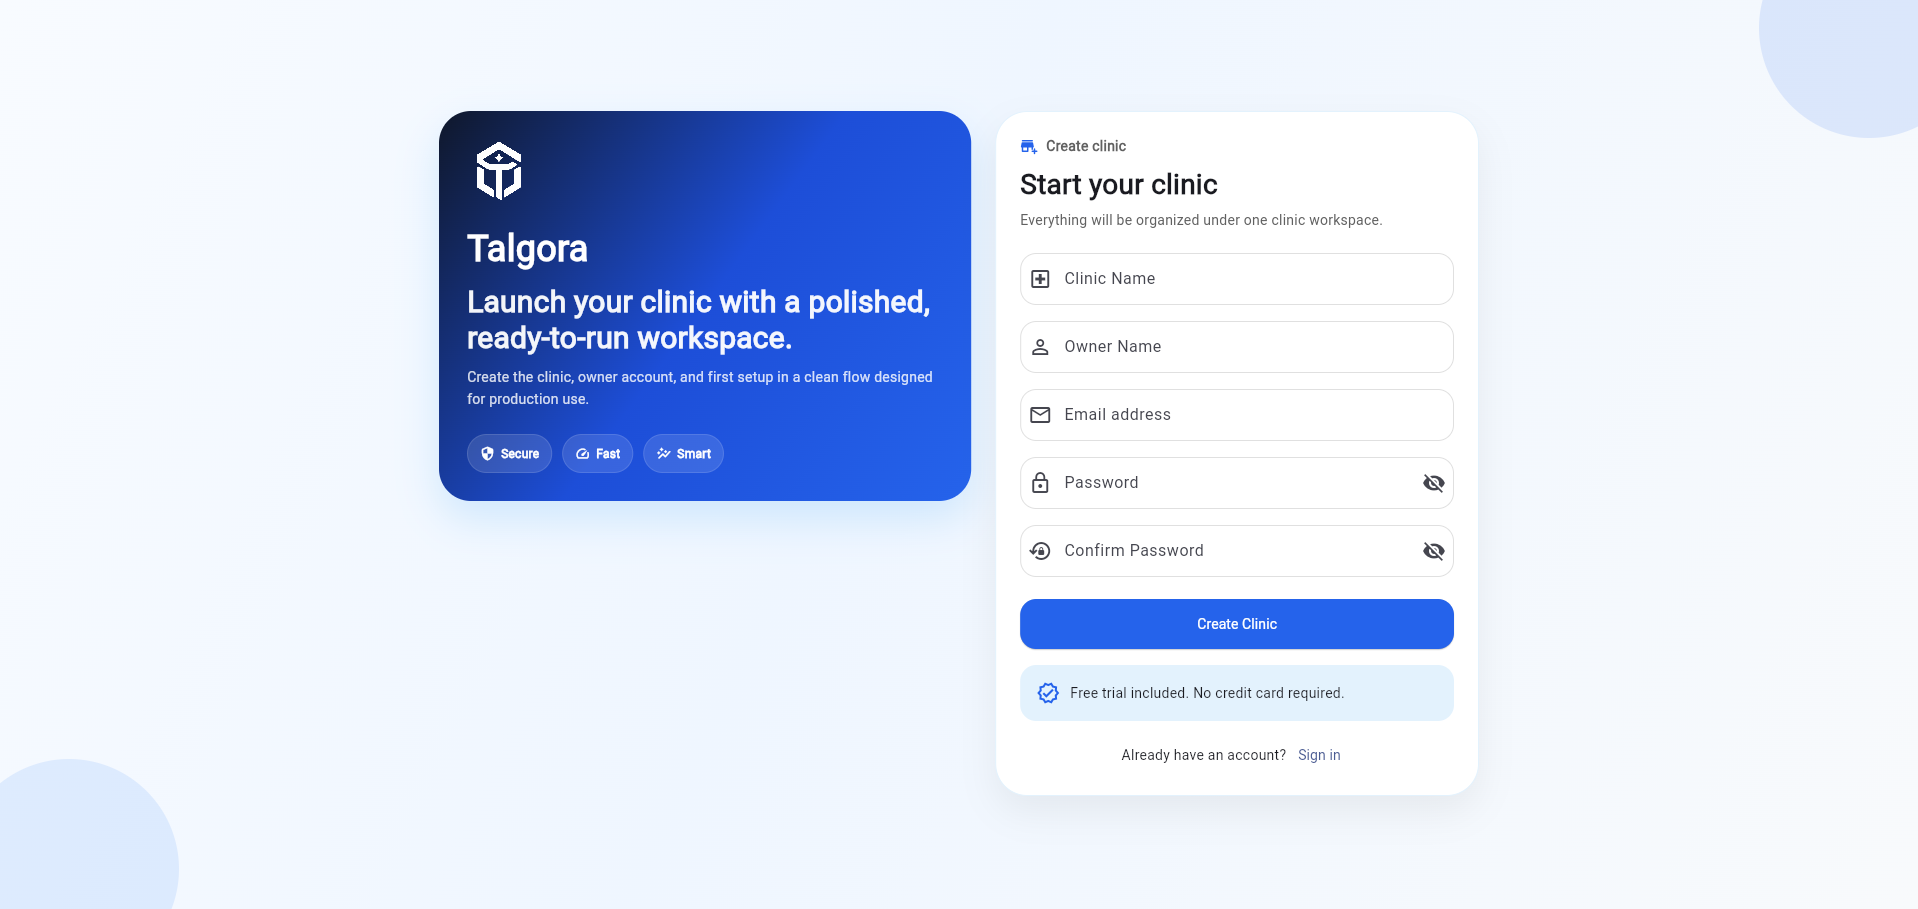
From the sign-in page, click Create Clinic and enter your clinic information to create your Talgora account.
Step 02
Confirm Your Email
After creating your clinic, check the inbox for the email address you registered with. Open the Talgora confirmation email and click the verification link.
Email confirmation is required
Your email must be confirmed before you can start using your clinic.
Step 03
Complete Your Initial Setup
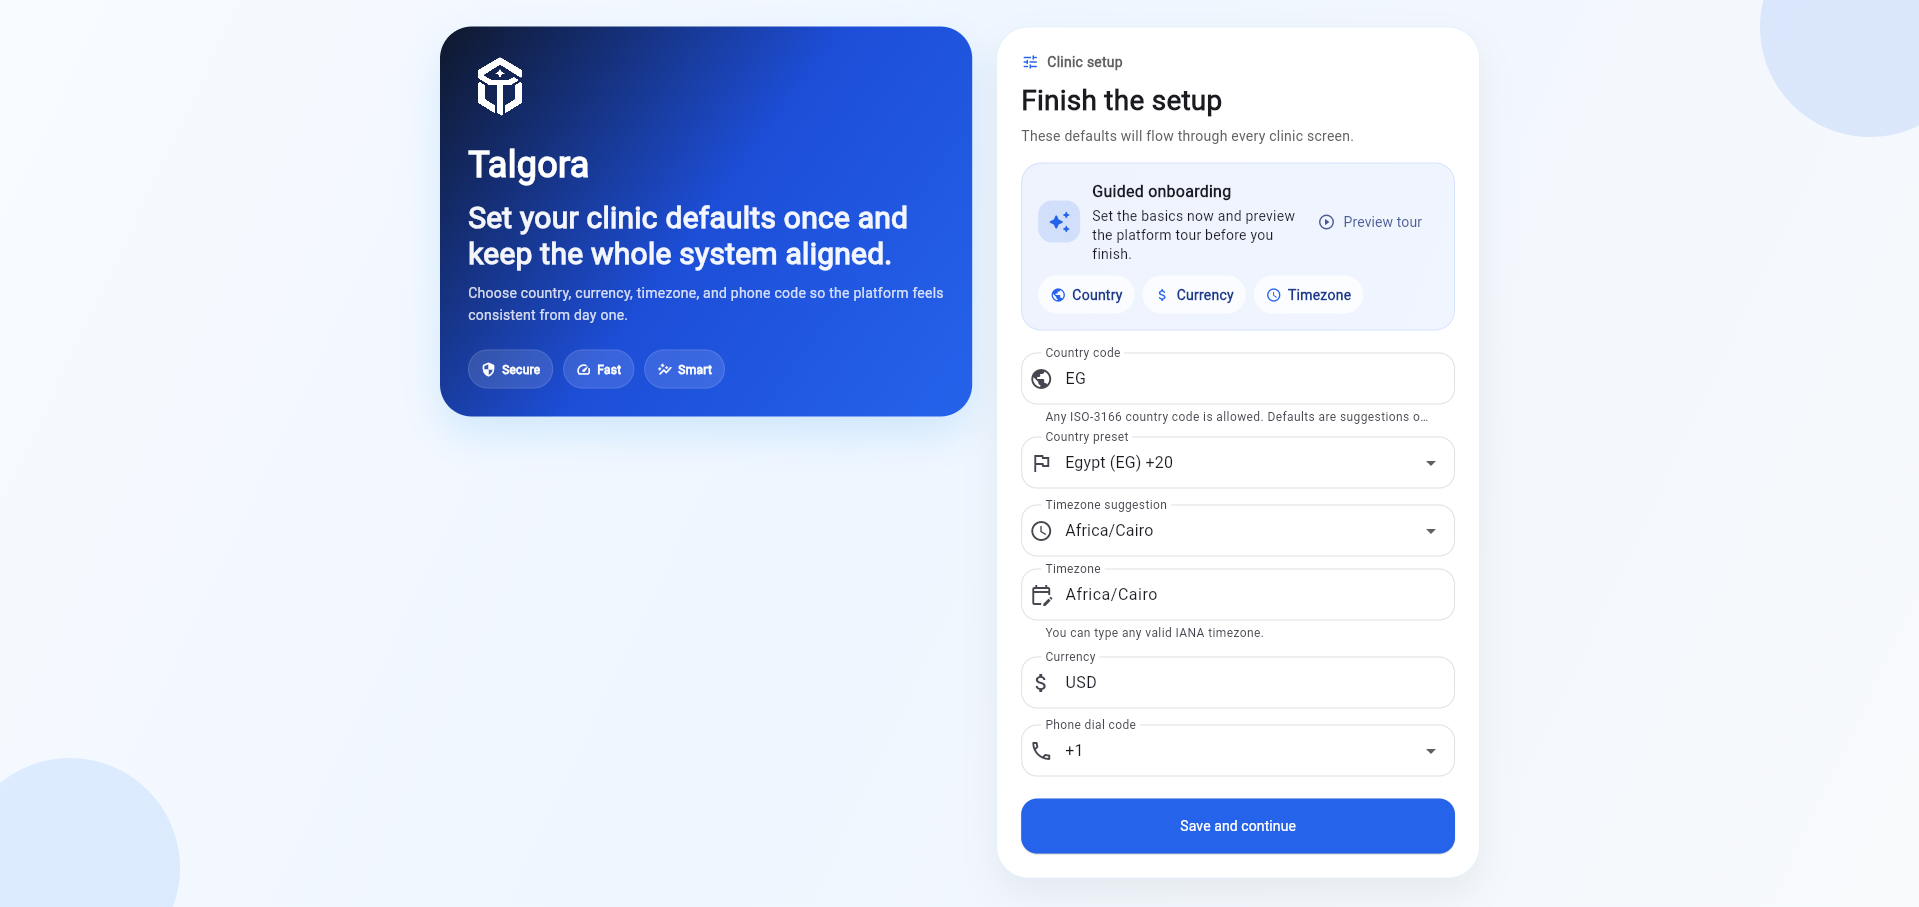
The first time you open Talgora, review your clinic's basic settings, including country, timezone, currency and phone dial code. When everything is correct, click Save and continue.
This setup appears only during your initial clinic onboarding.
Step 04
Start From Your Dashboard
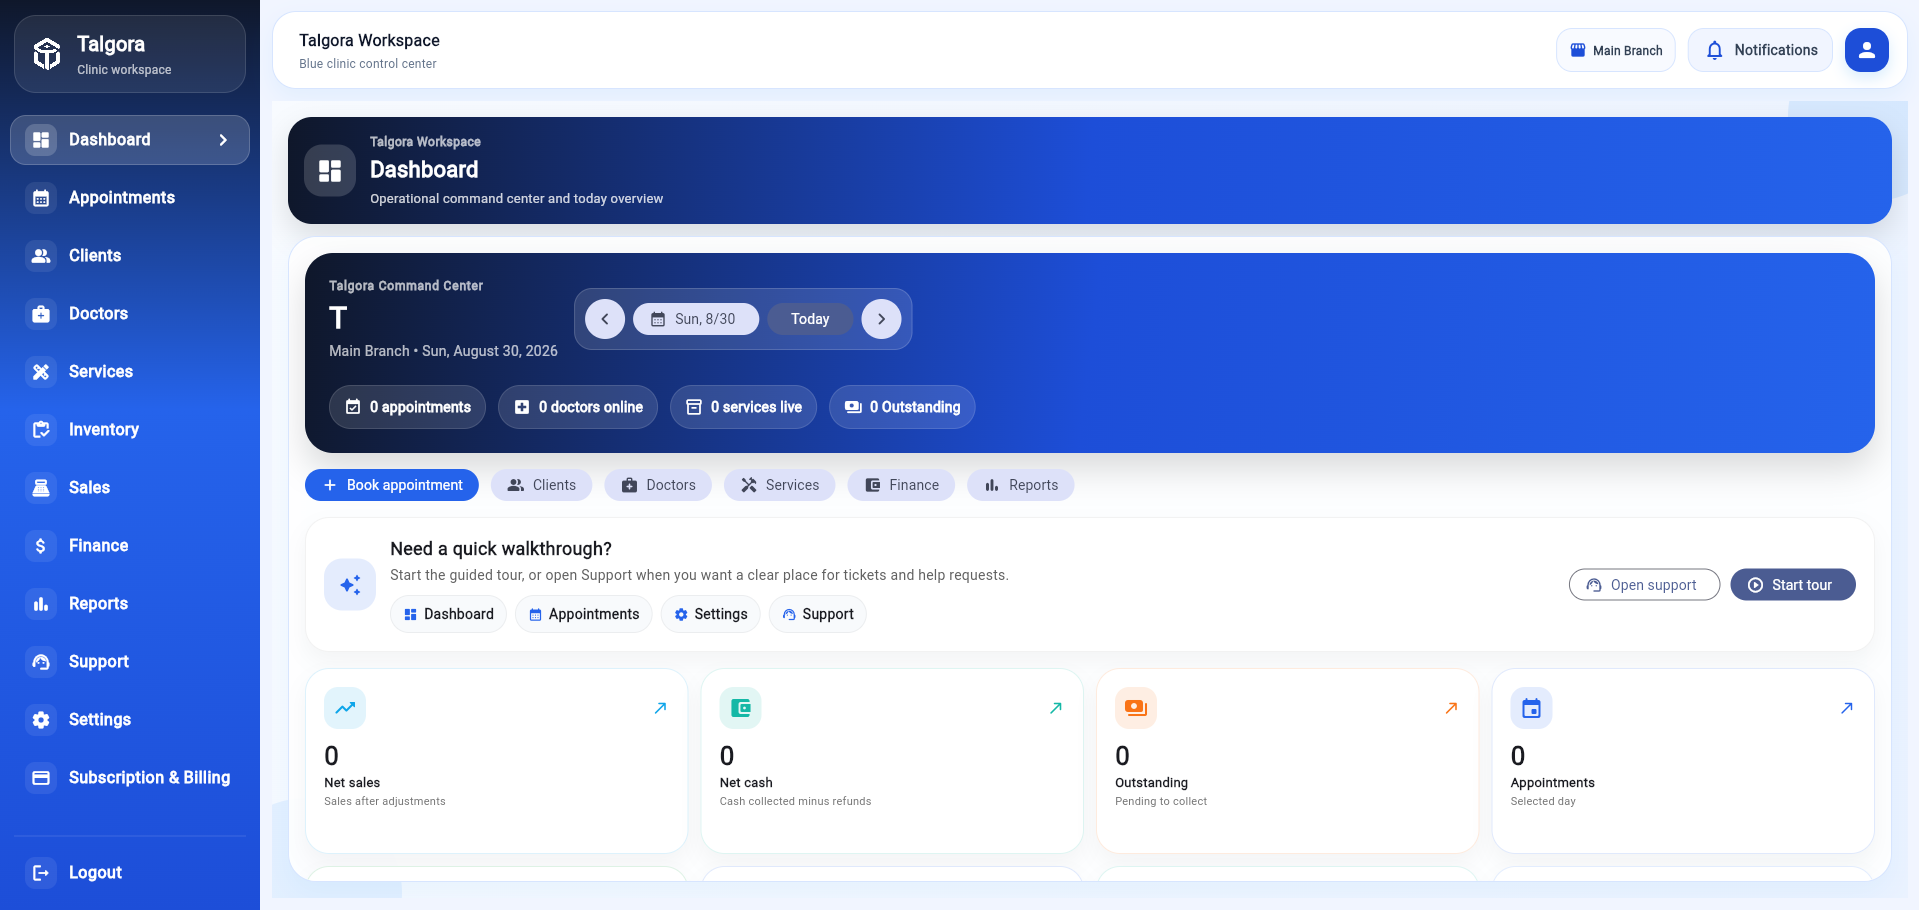
After completing the initial setup, Talgora opens your clinic workspace. From the dashboard you can access the main areas you need to configure before starting daily operations.
Step 05
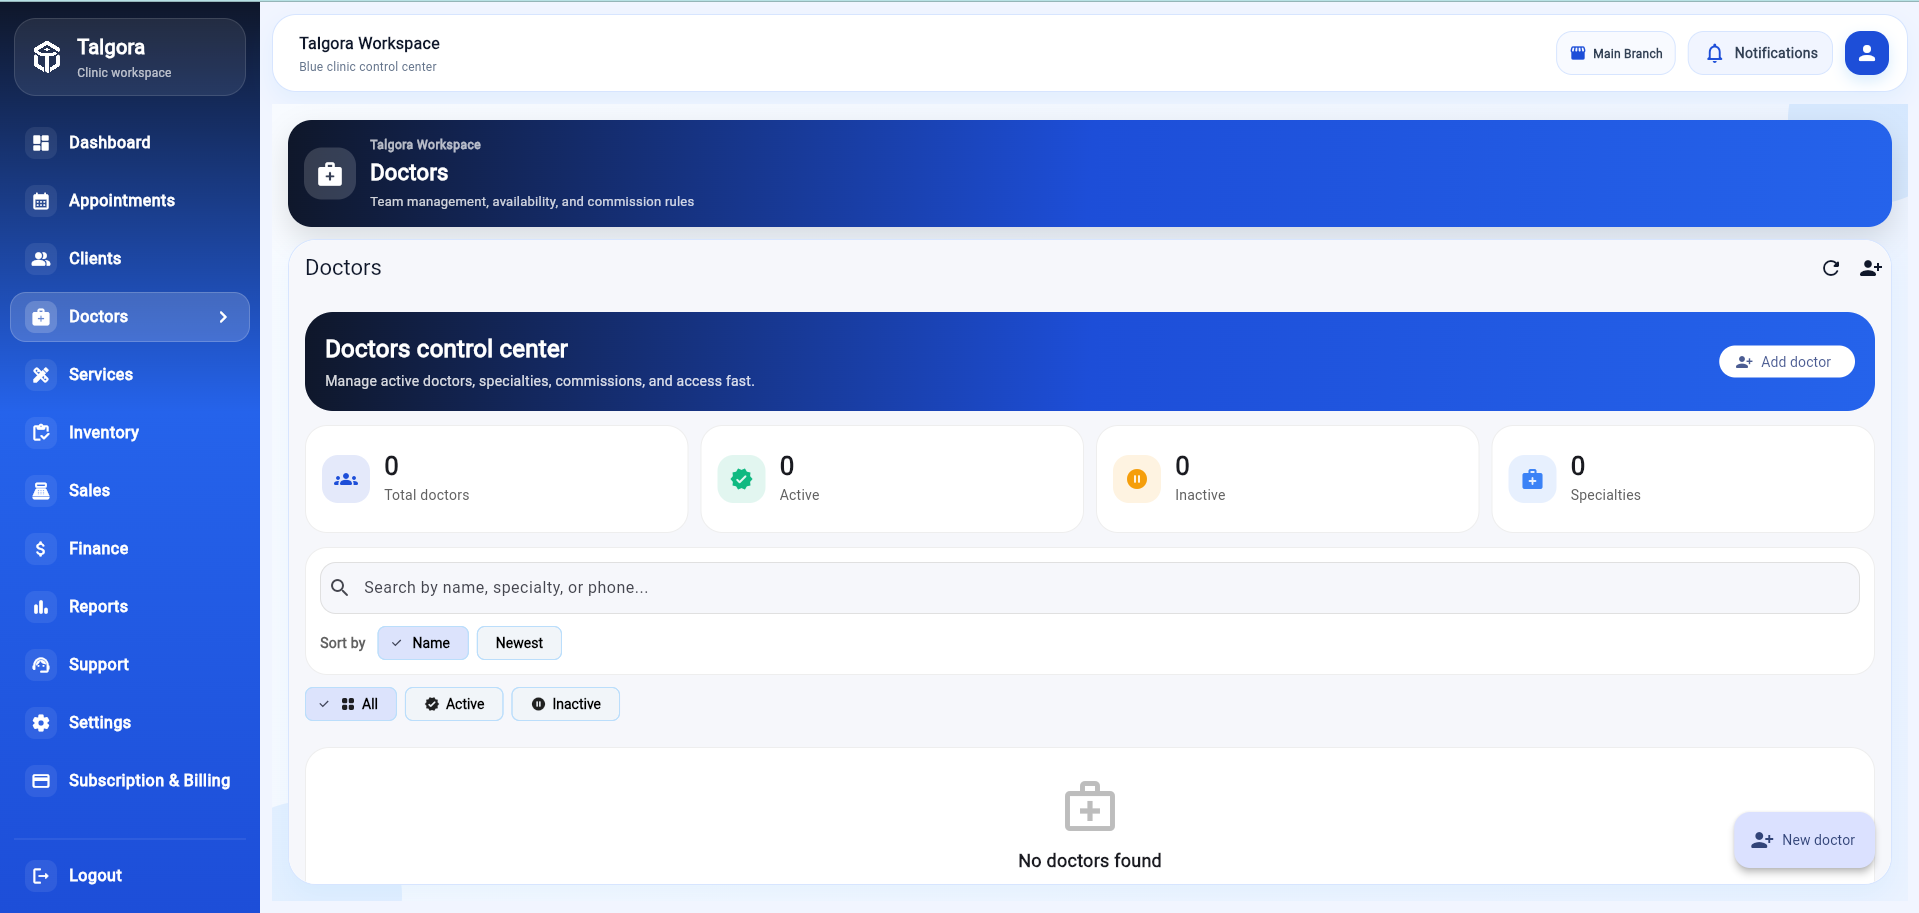
Add Your Doctors
Go to the Doctors section to view your practitioners and add the doctors who will provide treatments at your clinic.
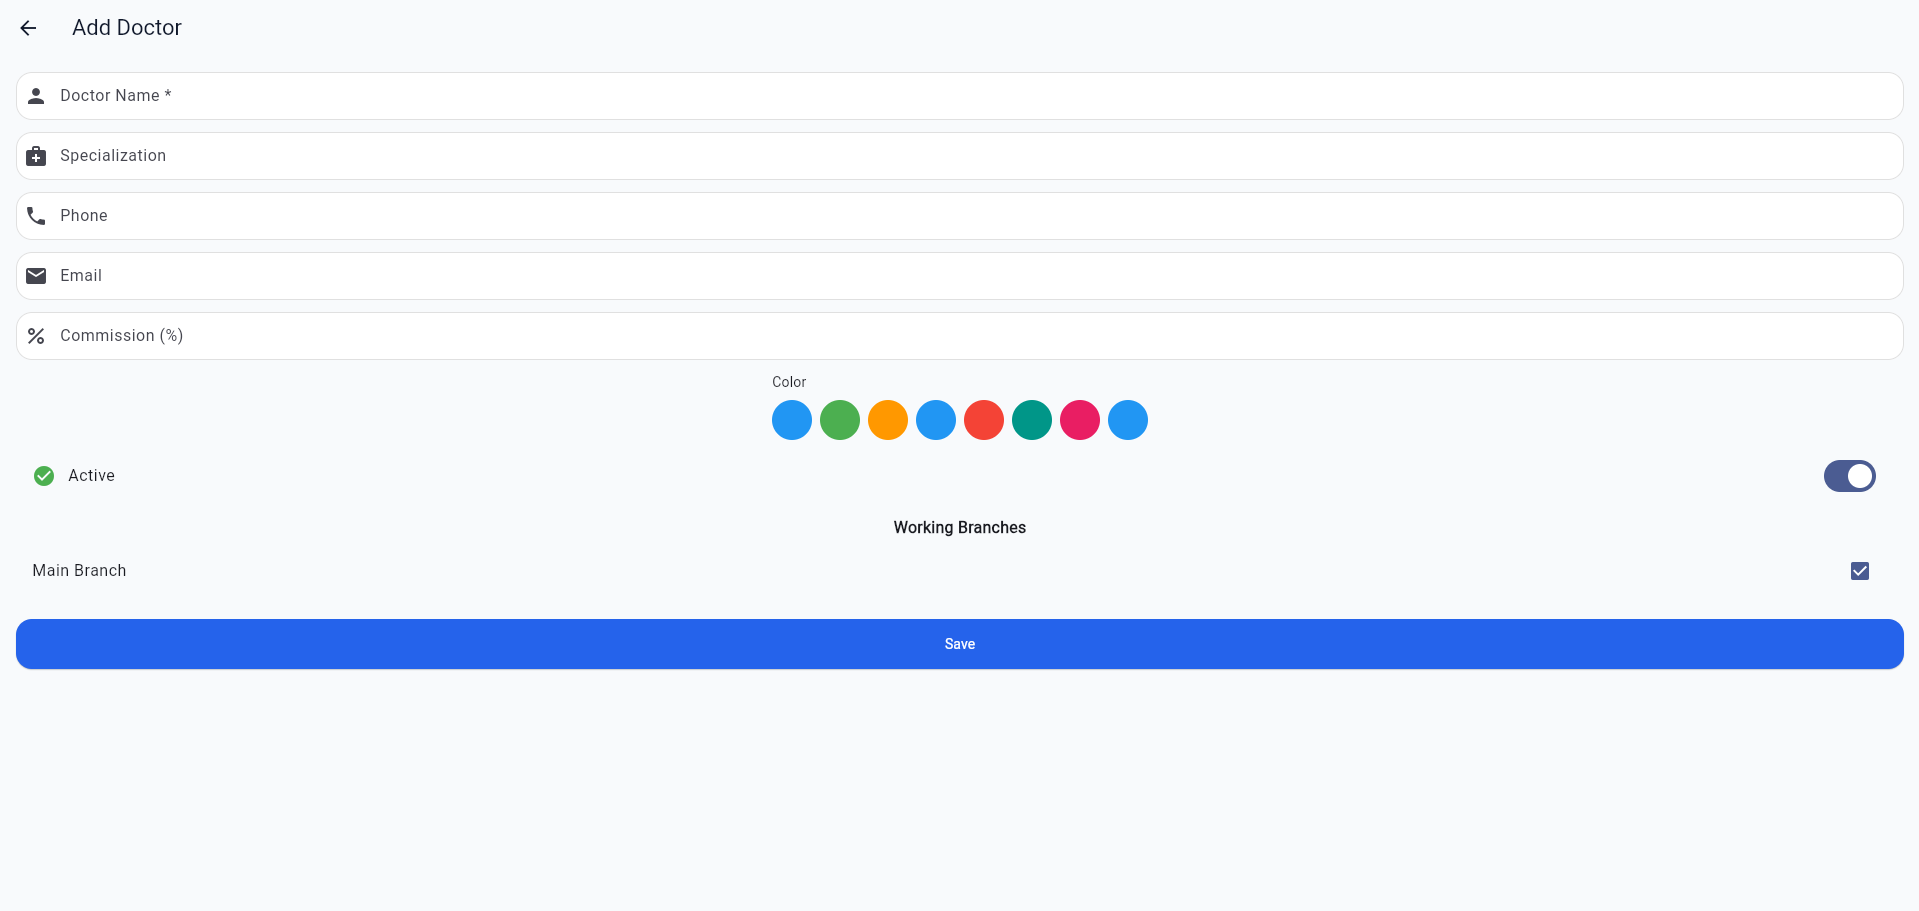
Select Add Doctor, enter the doctor's information and save the profile.
Step 06
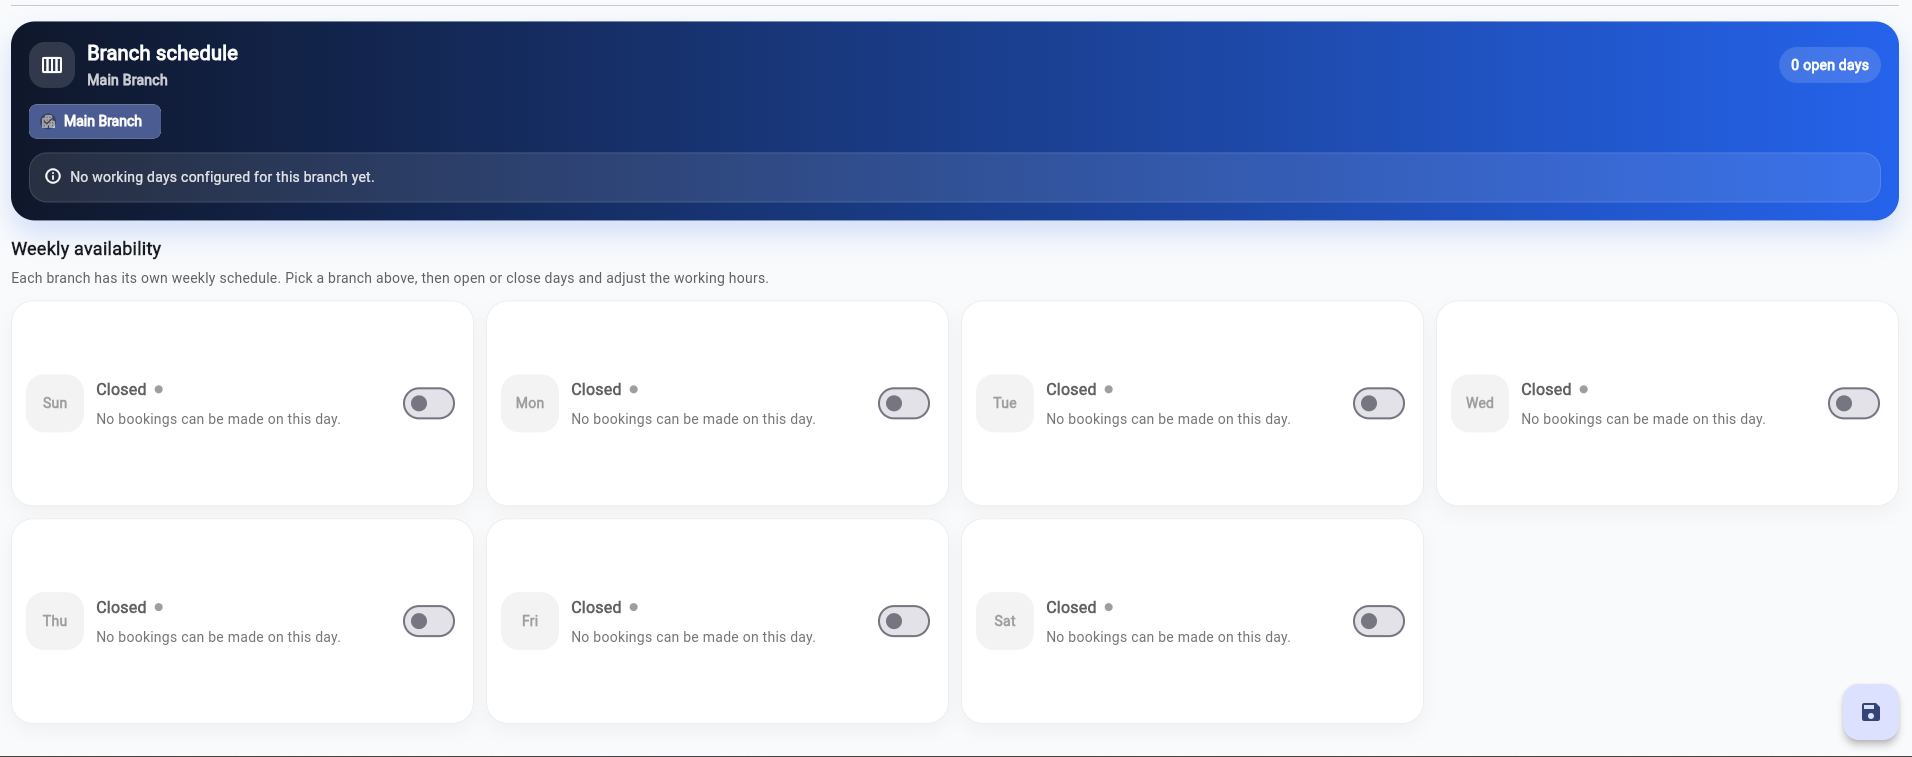
Set the Doctor's Working Schedule
The doctor's schedule is configured after the doctor has been created. First create and save the doctor. Then open the doctor's profile and click Edit. The Doctor Schedule section will appear, where you can configure the doctor's working days and hours.
Step 07
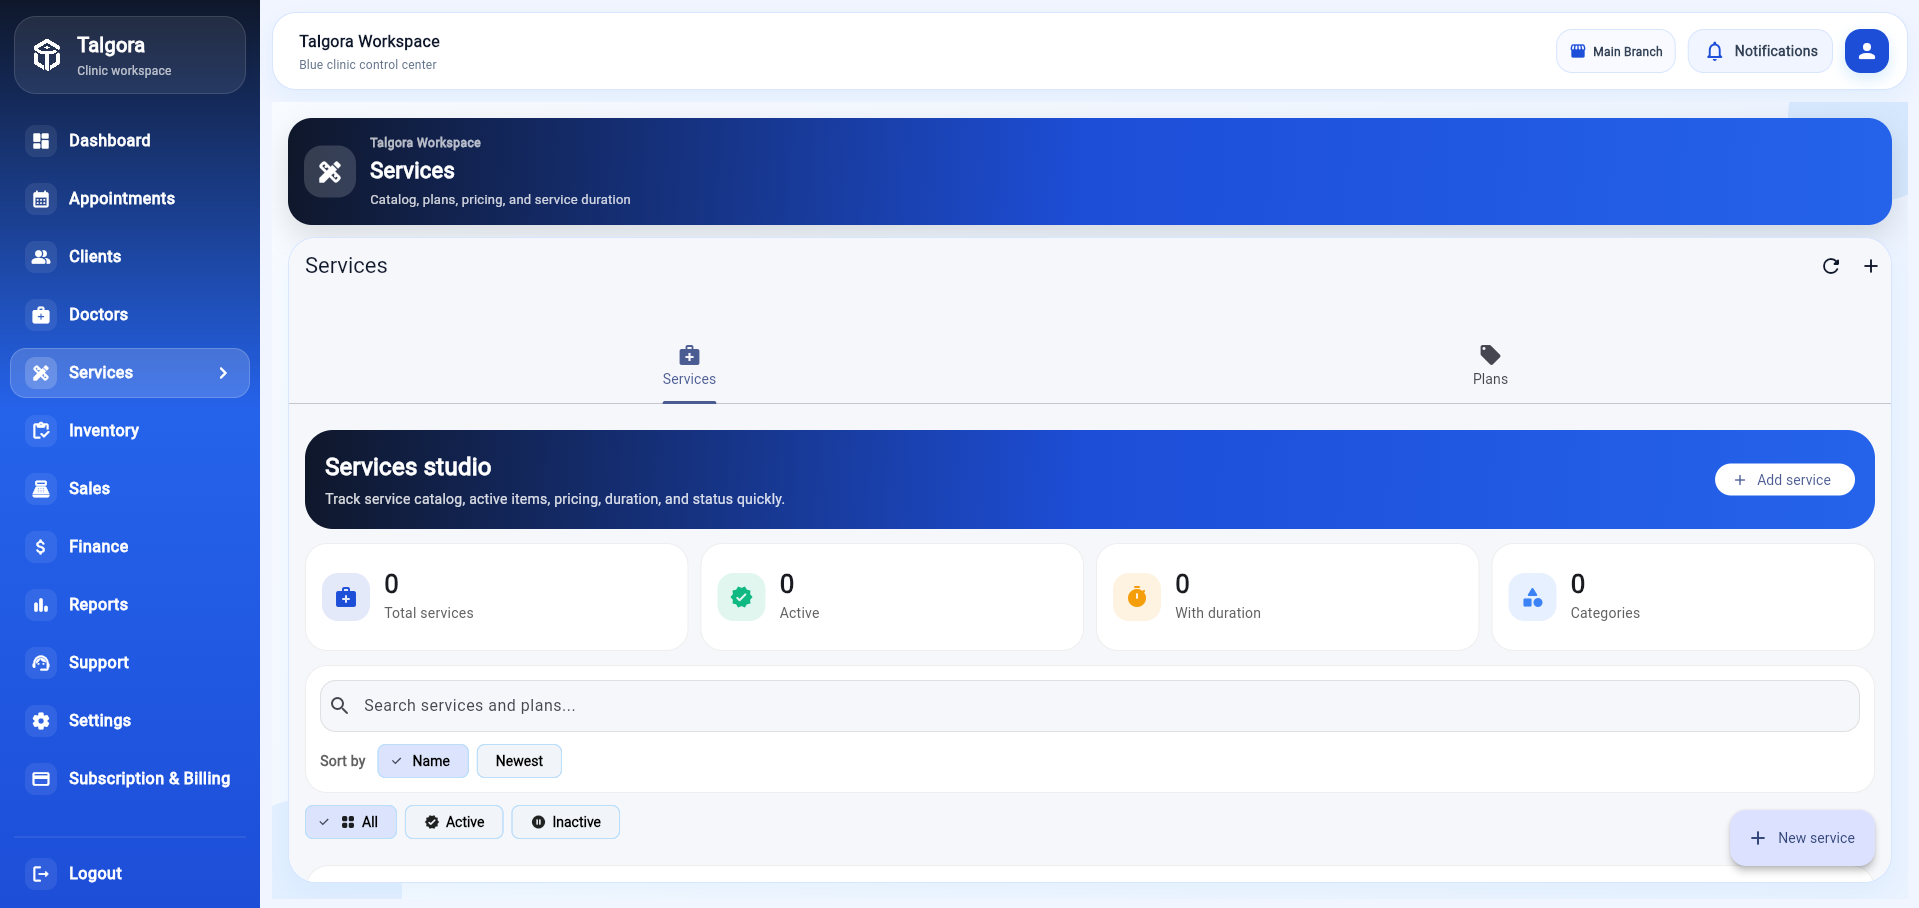
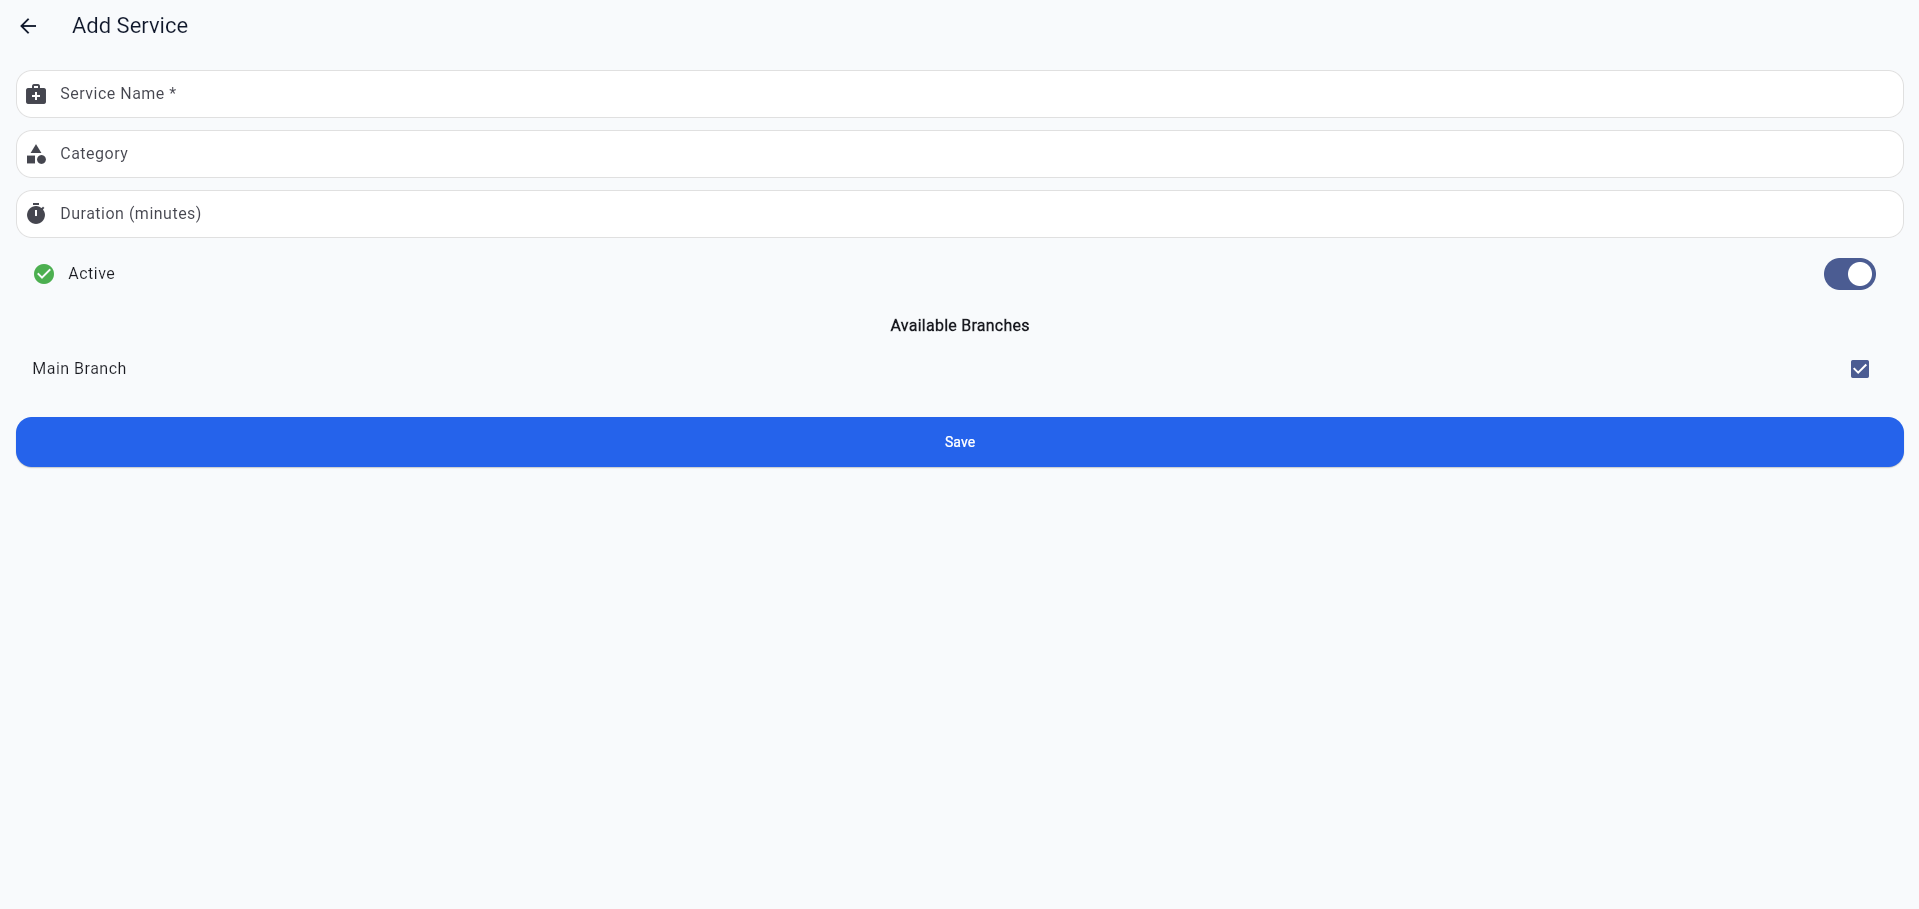
Create Your Services
Open the Services section to manage the treatments and services offered by your clinic.
Select Add Service and enter the service details required by your clinic.
Step 08
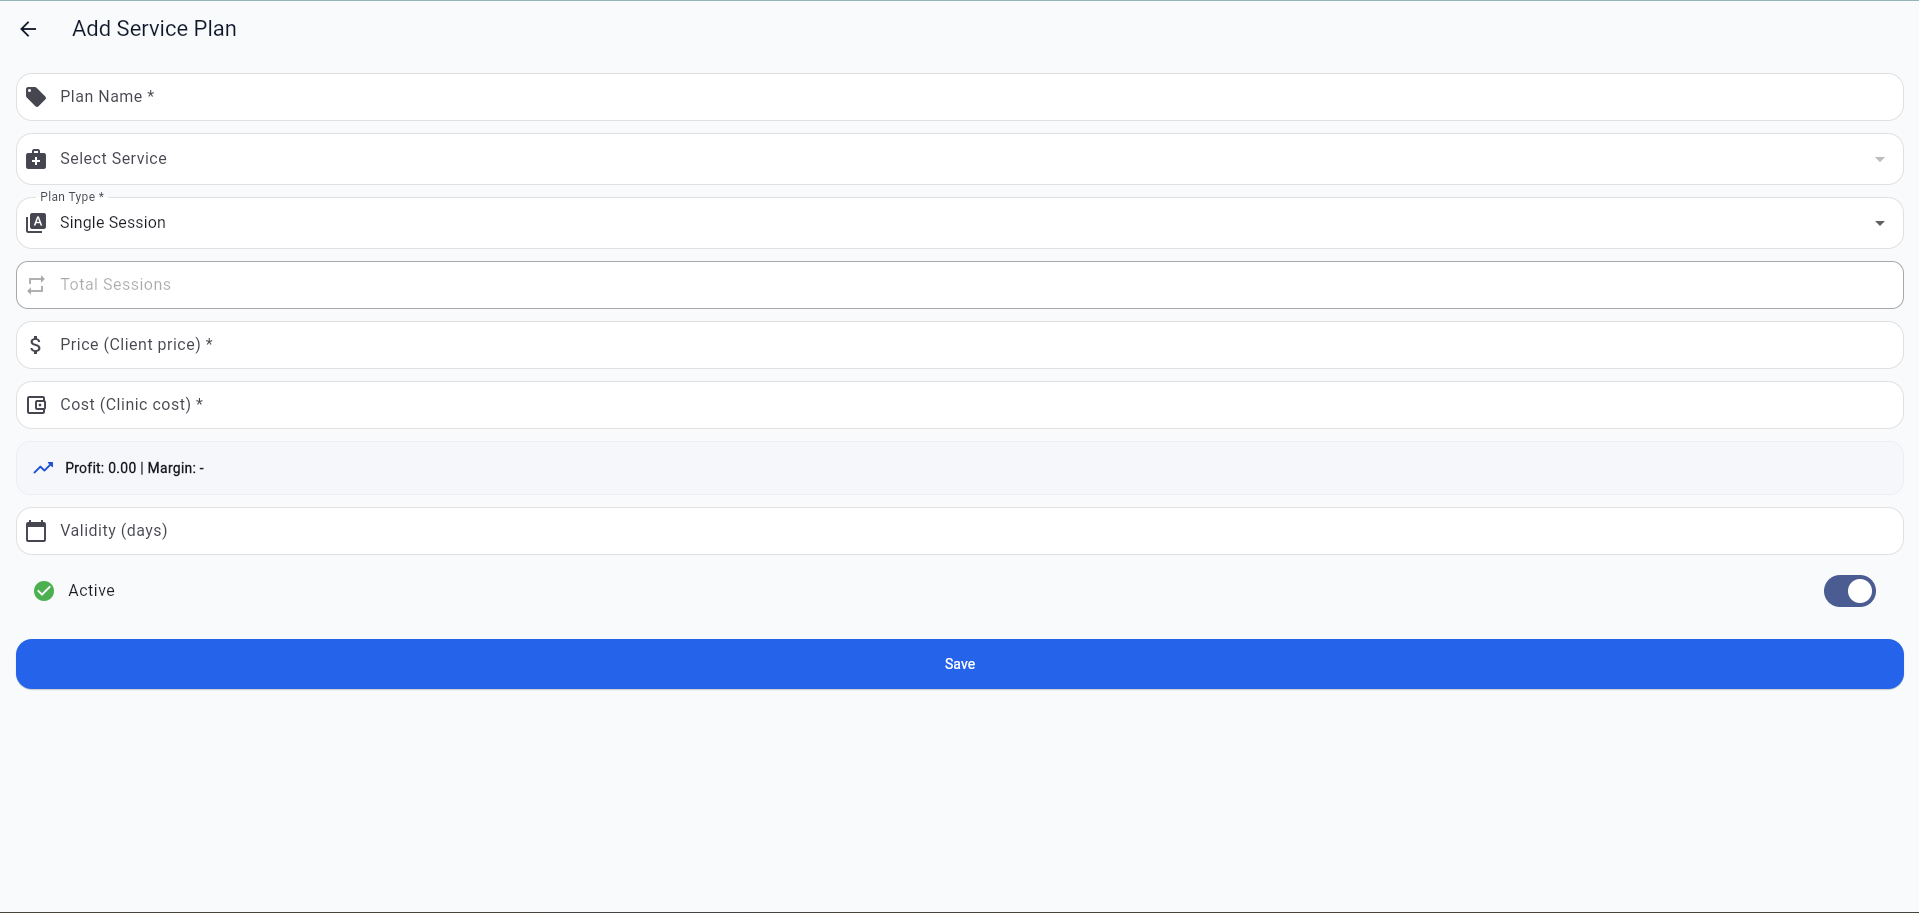
Configure Service Plans
After creating your services, configure the available plans associated with each service. This keeps your service structure ready for use with clients and future clinic workflows.
Step 09
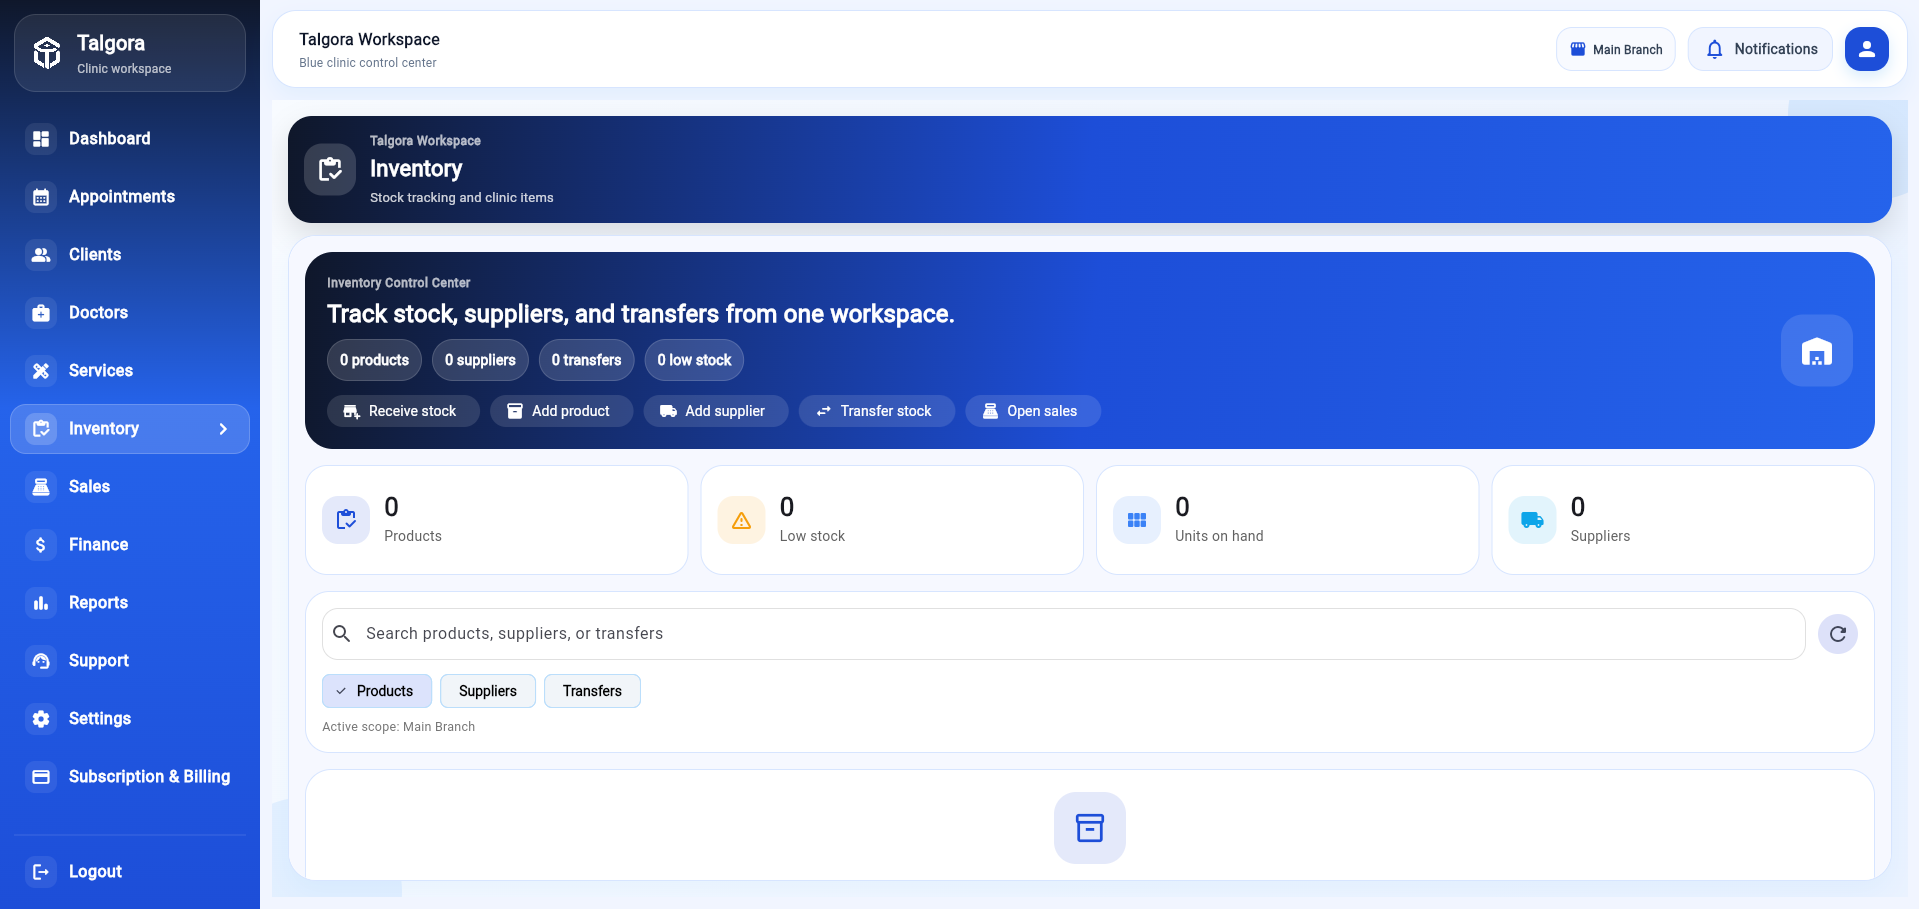
Set Up Your Inventory
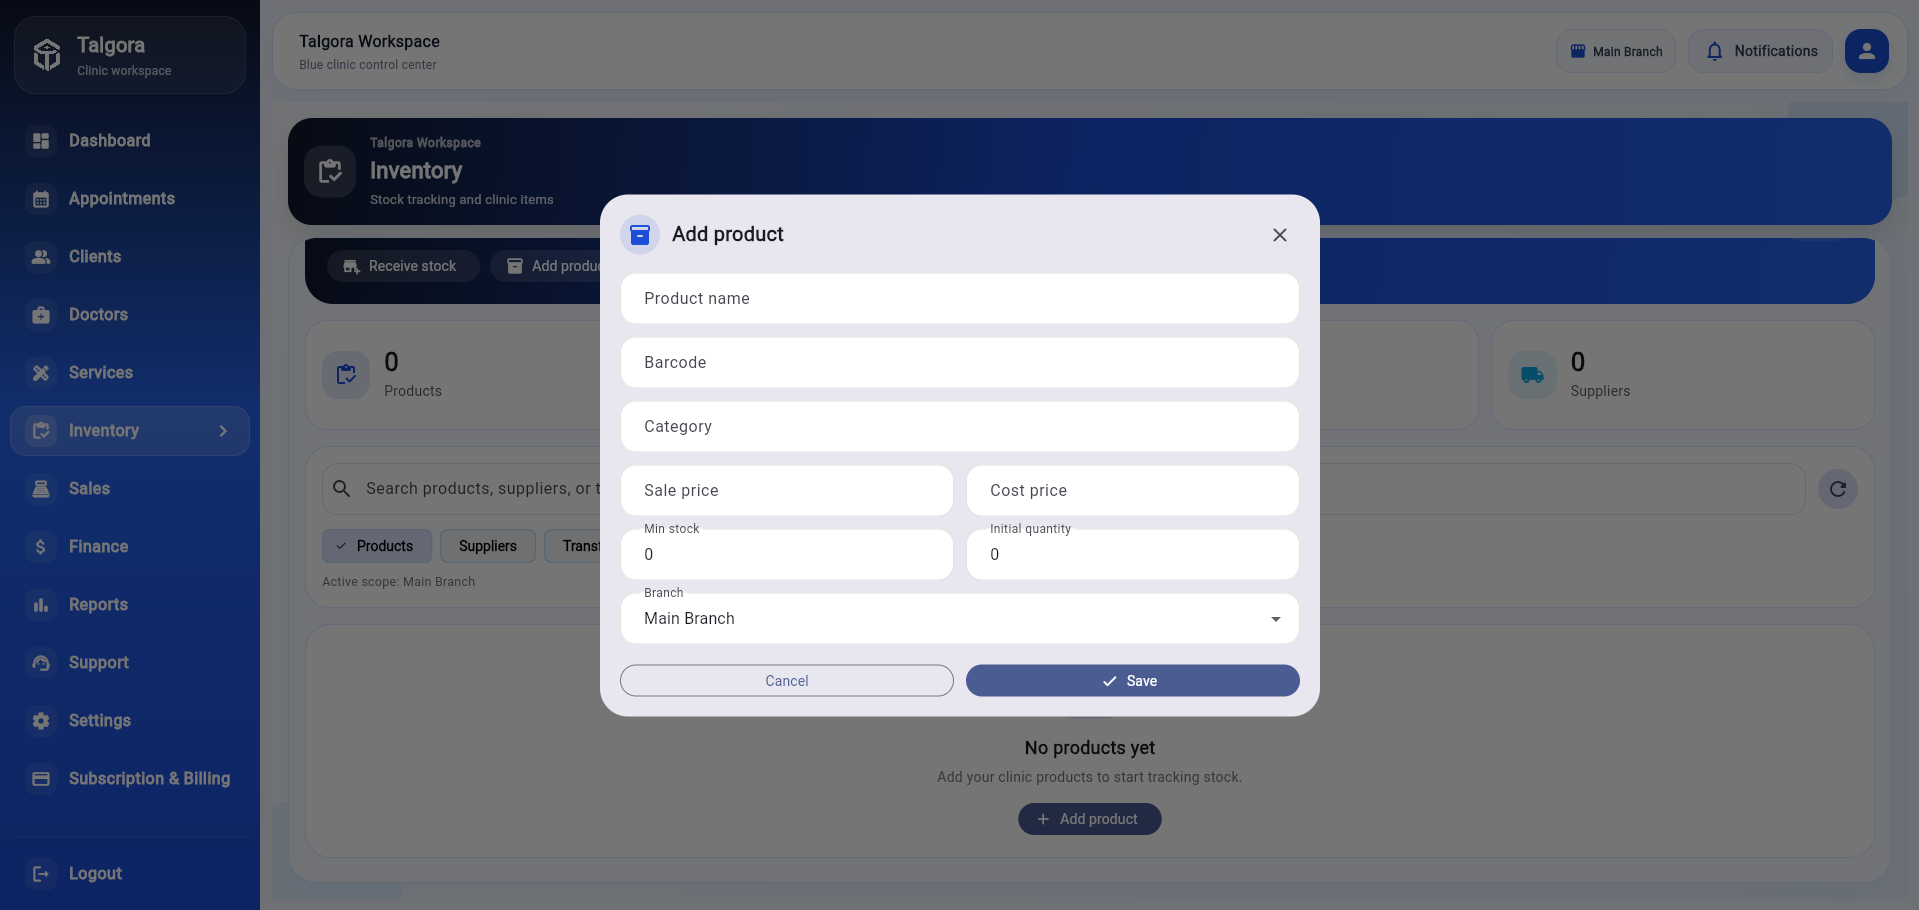
Use the Inventory section to add and manage the items and consumables your clinic uses during daily operations.
Add your inventory items and enter the available stock information needed by your clinic.
Step 10
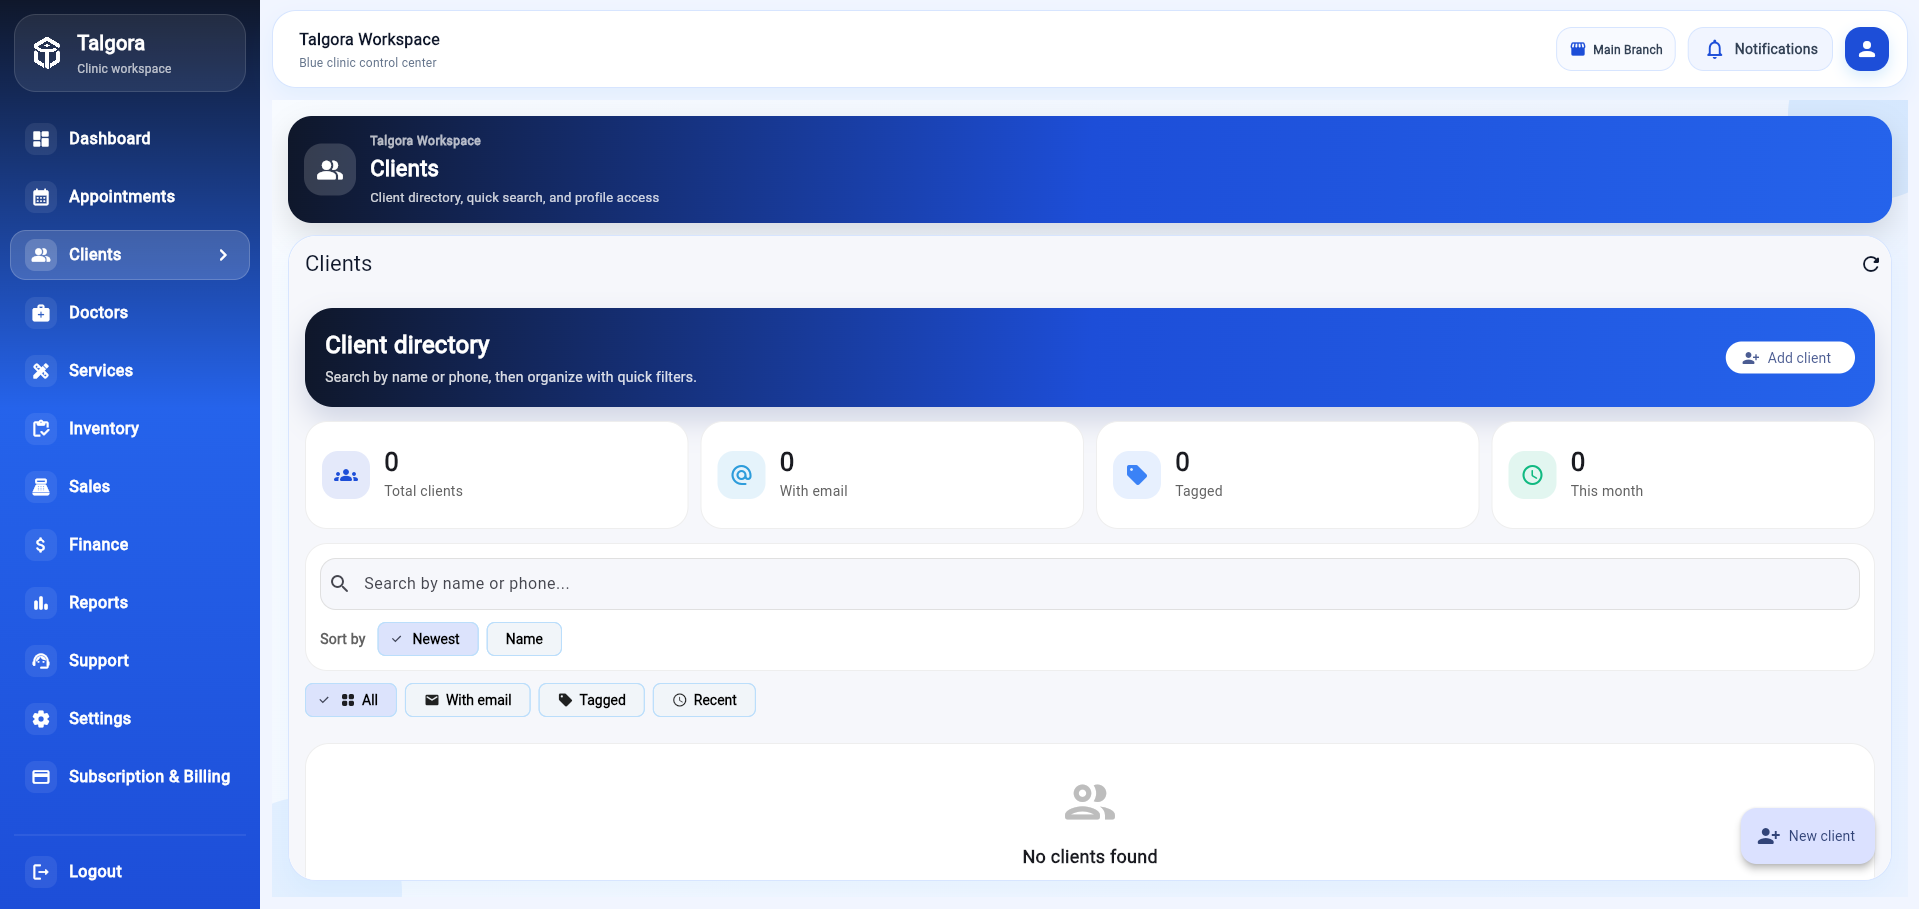
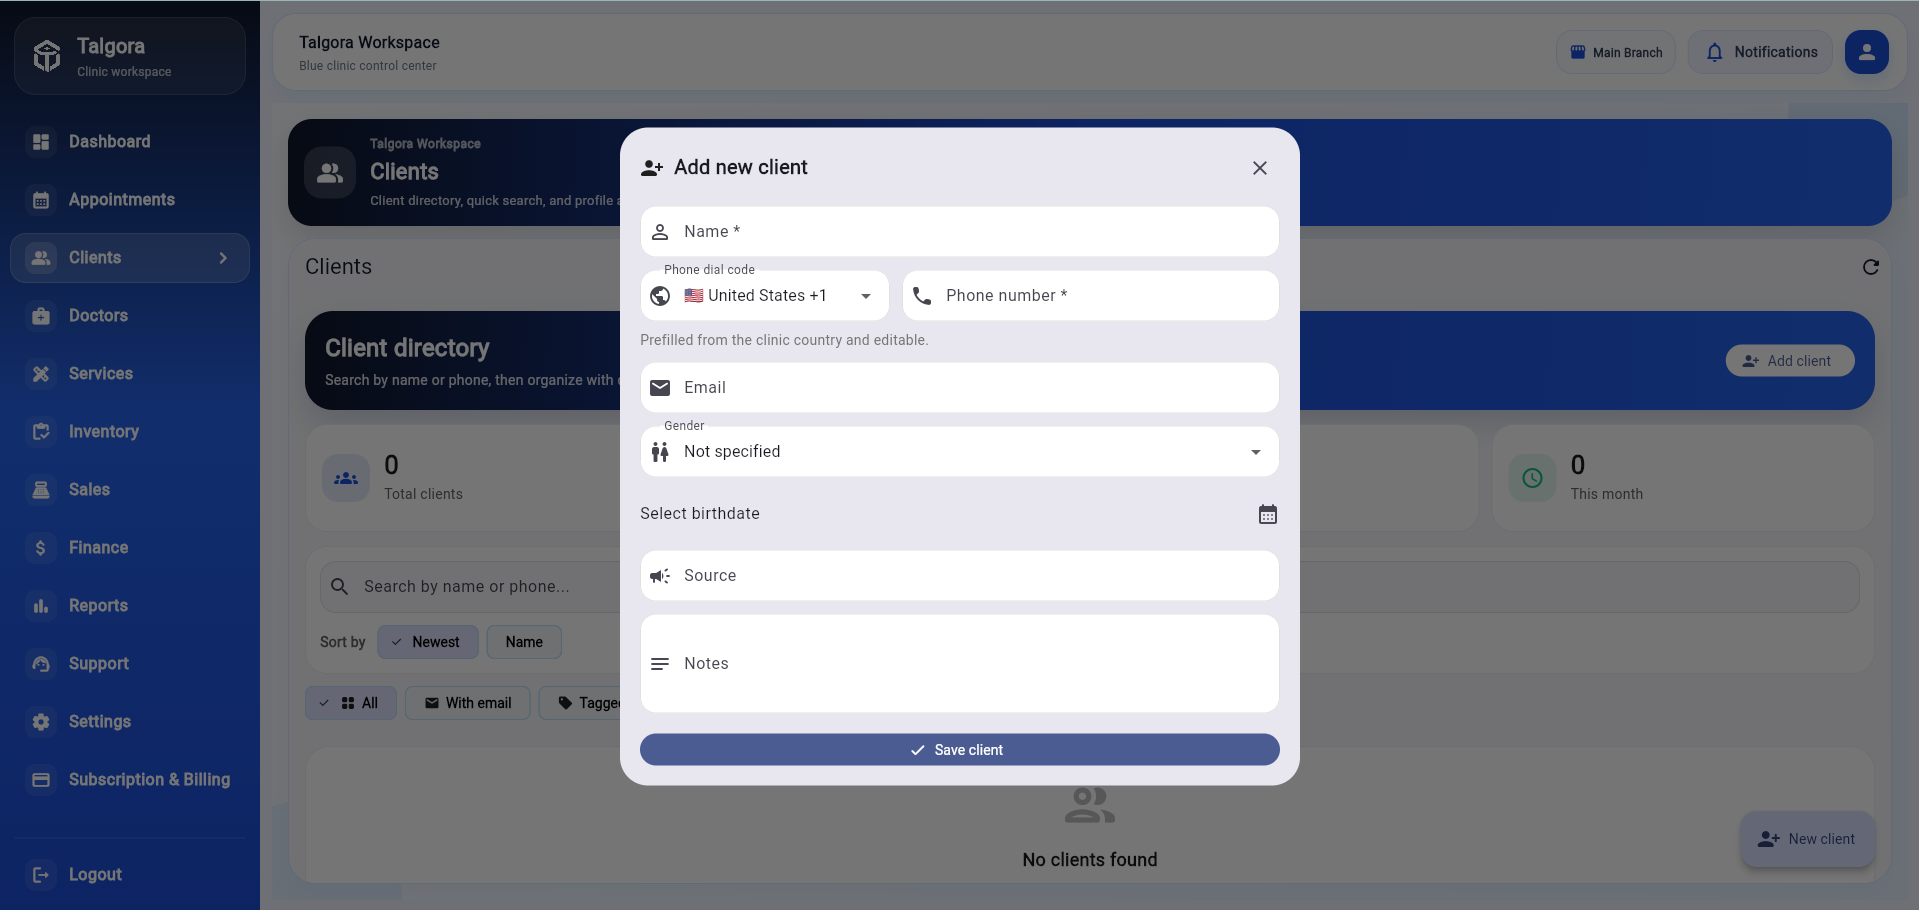
Add Your First Client
Open the Clients section to view your clinic's client records.
Select Add Client, enter the client's information and save the profile.
Your clinic now has the core setup needed to begin the next part of the Talgora workflow.
Your basic clinic setup is ready.
You've created your clinic, confirmed your account, configured your initial settings, added doctors and schedules, created services, prepared inventory and added your first client.
Next: Book Your First Appointment
More step-by-step Talgora guides are coming next.